

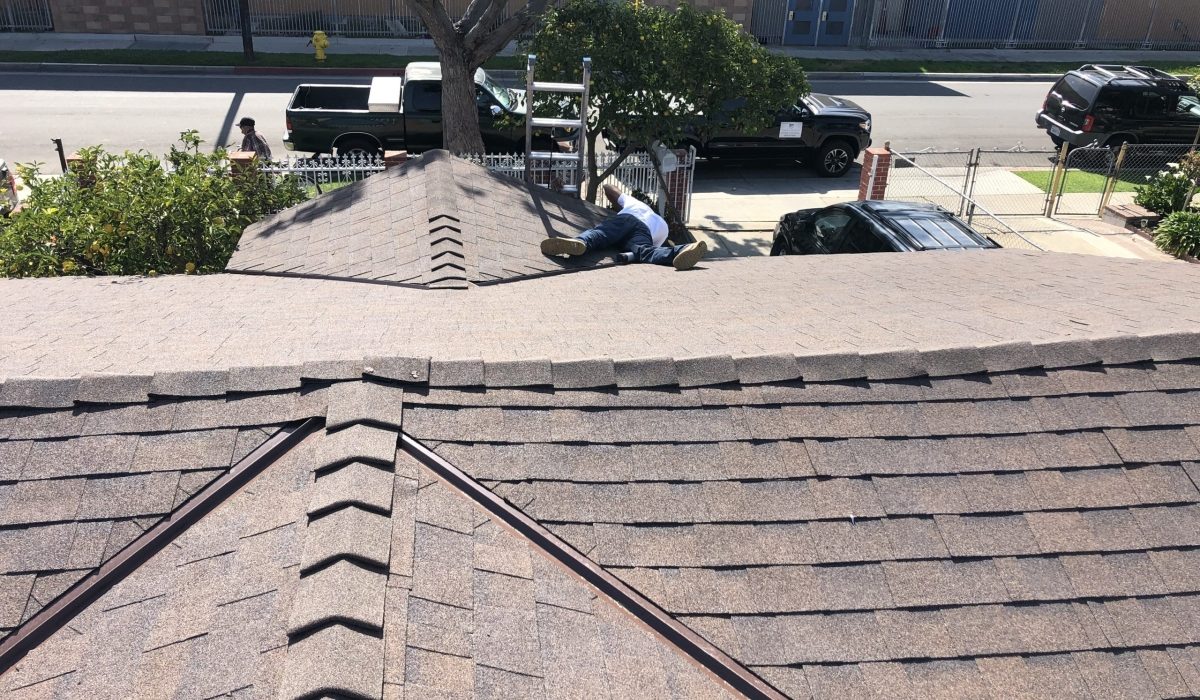
Storms do not damage every roof the same way, and they rarely reveal the full extent of impact at first glance. The first twenty-four hours decide whether small breaches become structural failures or are contained and repaired quickly. This action plan gives homeowners and property managers a precise sequence that protects safety, captures evidence that insurers trust, and accelerates professional repairs. It is written for real world decision making, not guesswork.
The 24-Hour Timeline That Prevents Secondary Damage
Hour 0 to 2: Safety triage
Confirm everyone is safe, keep children and pets away from hazardous areas.
Scan for downed lines and the smell of gas from a safe distance.
Check ceilings for fresh stains, bulges, or dripping.
Hour 2 to 6: Evidence collection
Photograph the roof and property perimeter from the ground.
Record attic conditions, insulation moisture, and any active leaks.
Start a damage log with times, observations, and locations.
Hour 6 to 12: Professional diagnostics
Book a same day assessment with a local specialist and request written findings.
Ask about emergency stabilization to stop water intrusion.
Prepare documentation for a potential claim.
Hour 12 to 24: Stabilize and schedule
Authorize temporary protection to secure the building envelope.
Decide on repair versus further evaluation based on inspection results.
Set the next check for the morning to confirm that leak paths are controlled.
Safety Triage Before Any Roof Contact
Ground level hazard sweep that saves lives
Start with a slow perimeter walk. Look for fallen branches or tiles, displaced metal flashing, broken skylight glazing, and clogged downspouts that may redirect water toward the foundation. Observe the roofline for areas that appear lower than others, which can indicate compromised decking. Resist the urge to climb a ladder. Hidden moisture weakens sheathing quickly and changes how it supports weight.
Utilities and local compliance
Treat any line near the home as energized. Call your utility provider before moving vehicles or clearing debris in the vicinity. Los Angeles residents can consult the Los Angeles Department of Building and Safety for guidance on emergency procedures, red tags, and permit triggers related to storm repairs.
Interior checks that reveal structural stress
Enter the attic with caution. Use a flashlight to scan rafters and trusses for cracks, fresh fastener streaks, and darkened underlayment. Note any musty odor that could signal a wet cavity. Place buckets under active drips and move stored items to a dry area.
Documentation That Insurers Recognize
Capture strategy for clear, credible evidence
Photograph wide angles, then step in for detail shots. Use a consistent order, for example clockwise around the house. Capture reference features like vents, skylights, and chimneys so later images can be mapped. Take short video panning across the roofline and over the yard where debris landed, which helps link impact sources to damage.
The evidence package that speeds approvals
Still photos, video, and a simple sketch that marks where each item was captured
Serial numbers for roof accessories like powered vents or heat cables
Receipts for emergency purchases such as tarps or sealants
A contact list with dates and times for utility calls and contractor bookings
File naming and sharing
Create folders by area and date. Use a pattern like 2025-10-09_Attic_East_Leak1.jpg for clarity. Sync to cloud storage so your inspector and adjuster can review in real time.
Rapid Diagnostics With Local Pros
Why the clock matters
Water spreads laterally through sheathing and insulation. What looks like a tiny stain at noon can become a room wide blotch by evening. Early diagnostics reduce tear out, shorten drying times, and prevent mold amplification.
What a trained inspector evaluates
A licensed specialist examines wind uplift patterns on shingles or tiles, the condition of fasteners and sealants, flashing assemblies at walls and penetrations, and the state of underlayment. If you need fast professional help, request a free roof inspection to obtain a documented assessment and a prioritized repair plan.
Triage indicators that require immediate action
Use the table below to communicate urgency when you book service.
| Symptom you see | Likely cause | Urgency level | Interim step |
|---|---|---|---|
| Bubbling paint or ceiling bulge | Pressurized water above drywall | Critical | Puncture a small relief hole into a bucket, then call a pro |
| Rust streaks at nail heads in attic | Chronic moisture at sheathing | High | Increase ventilation, schedule inspection within hours |
| Shingle tabs lifted uniformly | Wind gusts exceeding design rating | High | Avoid roof access, request stabilization |
| Pooled water on flat area | Blocked drains or membrane depression | High | Clear drains from ground level only, then seek service |
| Granules at downspout discharge | Impact displacement or aging | Medium | Save a sample bag for the adjuster |
Precision Mapping With Aerial and Digital Data
When aerial imaging changes the outcome
Complex roofs, steep slopes, and fragile tiles are safer to inspect from the air. Drone or satellite imagery provides plan view measurements that quantify impact clusters and ridge exposure. This data helps align contractor estimates with adjuster assessments.
Ordering the right deliverable
A detailed full satellite report includes square footage, pitch, facet outlines, and accessory counts. It is especially useful for multi-structure properties where manual measuring would delay emergency work.
Traditional versus digital inspection approaches
| Method | Coverage | Safety | Turnaround | Best use |
|---|---|---|---|---|
| Manual on-roof walkthrough | Selective on steep or fragile surfaces | Variable | 1 to 3 days | Small single slope areas when safe access exists |
| Drone flyover | Complete with zoom detail | High | Same day | Inaccessible slopes, tile assemblies, complex geometry |
| Hybrid workflow | Complete with ground truth | High | 1 to 2 days | Claims that require imagery plus tactile verification |
How to read a damage map
Look for facet labels, pitch arrows, and color codes that mark severity. Confirm that accessories like pipe boots, skylights, and vents are counted. Note any ridge and hip segments flagged for uplift, since those areas often drive leak paths after high winds.

Material Specific Failure Modes After Storms
Asphalt shingles, from uplift to granule loss
Wind can break the bond between adhesive strips and the course below. Affected tabs flutter, exposing nails and creating capillary leak paths. Hail or airborne debris can bruise shingles, dislodging granules that protect the asphalt from ultraviolet light. Addressing these conditions quickly with shingle roof repair and replacement prevents accelerated aging.
Flat membranes that hold or shed water
On low slope roofs, look for standing water at drains and scuppers, punctures from branches, and seam separations at parapets. Reinstate drainage first, since a half inch of standing water adds significant load across a wide area. Experienced teams who know flat roof systems and maintenance will evaluate deck deflection, substrate moisture, and the health of welds or adhesives.
Tile assemblies and the underlayment that keeps them watertight
Clay and concrete tiles often survive wind and hail, yet the waterproofing layer beneath is the true barrier. After storms, cracked tiles and displaced ridge caps expose felt or synthetic underlayment to sun and rain. Schedule specialized service that understands weight, walkability, and fastening schedules through tile roof restoration options.
Penetrations and terminations
Skylights, chimneys, solar standoffs, satellite dishes, and plumbing vents concentrate risk. Check counterflashing at vertical walls, sealant at storm collars, and pan flashings at curbs. Many leaks begin here rather than at the field of the roof.
Structural Elements That Dictate Post Storm Performance
Underlayment choices and why they matter
Traditional felt provides temporary protection, but it can wrinkle and absorb moisture. Modern synthetics resist tearing and improve walkability. Ice and water membranes around eaves, valleys, and penetrations limit wind driven water intrusions.
Decking, fasteners, and pull out resistance
Thicker sheathing and appropriate fasteners increase resistance to uplift. Pre storm upgrades like adding ring shank nails or screws in high exposure zones often keep a roof intact during gust fronts.
Flashing assemblies that stop capillary creep
Step flashing at sidewalls, continuous flashing at headwalls, valley metal, and drip edge all manage water flow. Improper overlaps or corroded metals create hidden entry points that only reveal themselves when wind drives rain uphill.
Edge protection
Drip edge at eaves and rakes should extend over the fascia with proper underlap of the underlayment. This simple detail prevents water from curling back into the soffit during sideways rain.
Emergency Stabilization Without Making Things Worse
Tarping with outcomes in mind
A tarp should shed water, avoid introducing nail holes into undamaged areas, and stay in place under gusty conditions. Use boards or sandbags at edges rather than excessive fasteners in the field. Never cover a ridge vent so tightly that the attic loses the ability to breathe.
Field checklist for temporary protection
Photograph the area before you start so adjustments can be explained later.
Clear loose debris using extension tools from a ladder at eave height, not from the roof surface.
Lay a tarp so water runs to a gutter, not toward a wall or curb.
Secure edges with weighted battens, avoid nailing through valleys or flashing.
Recheck after thirty minutes of rainfall to confirm the path sheds properly.
Interior containment
Move furniture and electronics, lay plastic sheeting, and create safe drip paths into buckets. Keep dehumidifiers and fans running while waiting for permanent repairs.
Know when to stop
If the area feels springy or if there is any doubt about structural integrity, stop and wait for professional help. Safety remains the priority.

Selecting Local Pros With the Right Credentials
Proven local experience
Storm recovery is as much about logistics as it is about craft. Local teams mobilize faster, understand neighborhood access and microclimates, and know which materials perform best under regional conditions. To connect with a trusted specialist, reach out to a roofing contractor in Los Angeles, CA with verifiable licensing and insurance.
Vetting checklist that protects your project
State license number, insurance certificates, and workers compensation coverage
Photographs of recent storm repairs with references
Written scope, materials list, and warranty terms
Clear communication about stabilization timing and permanent repair scheduling
Red flags
Unmarked vehicles, pressure to sign on the spot, and requests for large cash deposits are warning signs. Prioritize transparency and documentation.
Financing That Keeps Projects Moving
The cost of waiting
Delays increase tear out costs and can void coverage if additional damage results from inaction. Financing bridges the gap between immediate need and claim processing.
Options built for urgent work
Flexible terms can reduce upfront strain and keep the project moving while you finalize claim details. Explore roof repair financing programs that align payments with your budget and your restoration schedule.
Aligning financing with claims
Ask your contractor to structure phases that match expected claim disbursements. This approach limits out of pocket exposure while ensuring critical work proceeds.
Repair Versus Replacement With Clear Criteria
How to decide with confidence
Consider roof age, percentage of field damage, condition of underlayment, and local code requirements. If storm damage affects multiple planes or reveals systemic underlayment failure, replacement often delivers better lifecycle value.
Ten year cost view
| Option | Average upfront cost | Warranty range | Lifespan gain | Ideal scenario |
|---|---|---|---|---|
| Targeted repair | Lower initial spend | 1 to 3 years | 2 to 5 years | Isolated impacts, healthy underlayment |
| Full replacement | Higher initial spend | 10 to 30 years | 15 to 25 years | Widespread damage, aging system, code upgrades required |
Insurance Workflow That Speeds Approvals
Filing chronology that avoids delays
File once you have baseline photos and a professional assessment. Include the written estimate, photo index, and any aerial measurements. Note any emergency mitigation steps taken to prevent further loss.
Adjuster coordination
Schedule the site visit when your contractor can attend. Bring printed highlights from your imagery and be ready to point out attic findings, softened decking, or active stains.
Documentation kit
Image index with file names and locations
Contractor estimate with scope line items
Aerial measurements and roof facet diagram
Receipts for temporary protection and drying equipment
Navigating disagreements
If a line item is disputed, ask for the basis in writing, provide additional images, and request a second review. Persistence, not confrontation, wins most claims.
Permits, Inspections, and Local Triggers
When permits are typically required
Structural repairs, major roof replacements, and changes in material type often require permits. Temporary protection and small maintenance tasks may be exempt, but always confirm locally. Compliance ensures warranty validity and smooth resale later.
Code considerations that influence scope
High wind exposure zones, wildland urban interface areas, and cool roof requirements can shape material choices and fastening schedules. Your contractor should specify how the chosen assembly meets local regulations.
Preventive Upgrades Before the Next Storm
Drainage that actually moves water
Oversized downspouts, leaf guards, and well pitched gutters prevent overflow that can soak fascia and walls. In flat areas, consider auxiliary drains and crickets behind chimneys and walls.
Ventilation that dries the roof system
Balanced intake at soffits and exhaust at the ridge lowers attic humidity and temperature, which protects sheathing and underlayment. Good airflow reduces the chance that minor moisture becomes a persistent problem.
Materials with higher resilience
Impact rated shingles, reinforced hip and ridge accessories, and corrosion resistant fasteners all add durability. On tile roofs, upgraded underlayment and enhanced ridge fastening help resist wind events.
Neighborhood Recovery and Multi-Property Coordination
Share intelligence to move faster
Neighbors often face similar issues. Coordinating inspections can bring crews and aerial services to your block sooner and may lower unit costs for stabilization.
Document lessons for next time
Create a neighborhood contact sheet, note which drains clogged first, and log which trees or roof sections created the most risk. Small insights help the entire street prepare for the next weather system.
Day Two and Day Three Planning That Complements the First Day
The first day is about safety, documentation, and stabilization. The next two days are about verification and scheduling. Recheck any tarped zones after the next rainfall, then confirm material availability and permit requirements. Set calendar reminders for follow ups with the contractor and adjuster, and keep all records in one shareable folder.
A Homeowner’s Quick Reference: The Essentials
Top five priorities within 24 hours
Protect people first, treat all lines as live, and keep off the roof.
Photograph everything, inside and out, in a consistent order.
Book diagnostics with a licensed local specialist.
Stabilize openings to keep water out until permanent repairs start.
Organize documentation for claims and permits.
What to keep handy
Heavy tarps, battens or sandbags, gloves, safety glasses
Flashlight, extra batteries, moisture meter if available
Plastic sheeting and tape for interior containment
A shared digital folder for all images and paperwork

Why a Fast, Structured Response Saves Homes and Budgets
A roof is both shield and system. The outer surface sheds water, yet the underlayment, flashings, deck, and ventilation determine whether a storm becomes a minor inconvenience or a major loss. Homeowners who follow a tight twenty four hour plan protect structural framing, preserve interior finishes, and move quickly through insurance and permitting. Local professionals, clear documentation, and timely stabilization form the trio that turns a stressful event into a controlled project with a predictable outcome.
For advanced diagnostics, scheduling, and material guidance tailored to your roof type and neighborhood conditions, use this plan to coordinate experts, capture credible evidence, and authorize work at the right time. Your roof can recover, and with the right choices in the first day, it will.